renaldi
Skydome and Ground
Go to “Edit > Edit Environment” and expand the Sky or the Ground categories. There is a white square with the label “Sky texture” (or “Ground texture” respectively). Clicking on this will open a texture picker window. Here there are 2 tabs. One is for colours and one is for textures. Select the texture tab, and look at the bottom left hand corner. There is an “Import” button here. Clicking on this will open a windows file browser to select the AVI file for import. This will put the video on to the sky of the Muvizu scene, or on to the Ground.

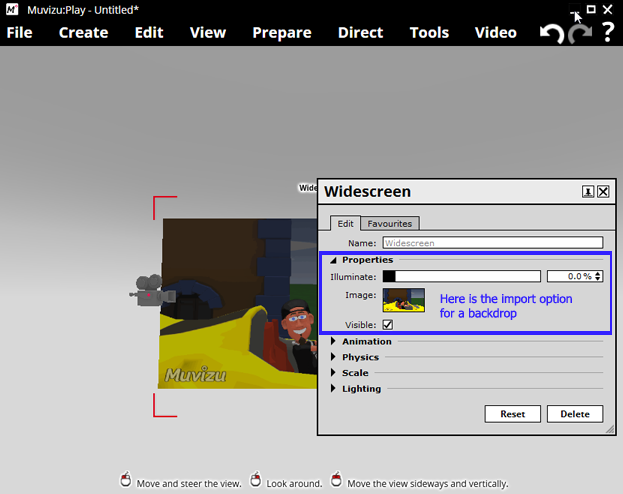
Backdrops
Create a backdrop and right click to edit it. Expand the “Properties” category, there is a a thumbnail icon with the texture displayed on that backdrop. The process to import a video is now the same as above.
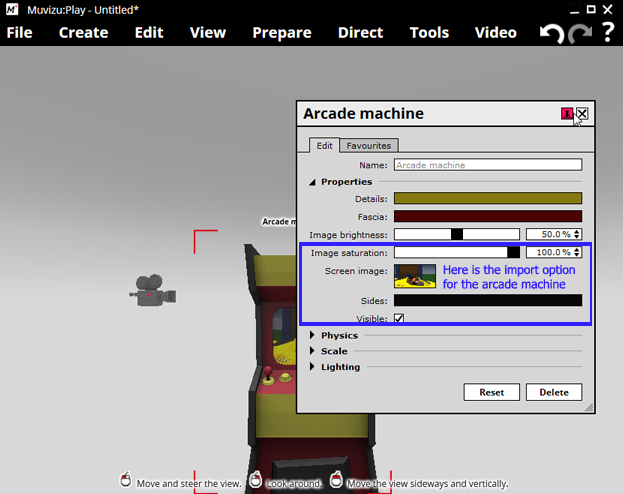
Objects
Similarly, there are several objects that can display video on them. Have a look in “Create > Objects” for some of the TV objects or the Arcade machine and you’ll be able to import a video to display on the screen.
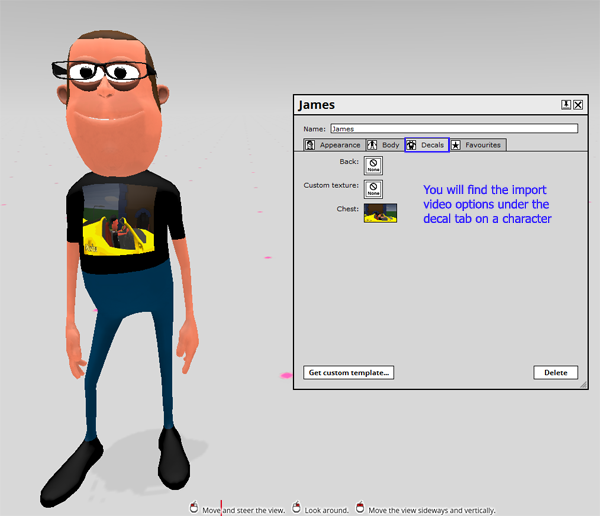
Characters
In fact, the same process will let you import videos on to the characters themselves. Just right click on the character and go to the "Decal" tab. Here there are a few options for importing videos.
Imported video file recommendations
Any video that is imported in to Muvizu must be an AVI video file. .mov, .wmv, .mp4 or any other video format simply won’t work. To use a video from another format you will need to convert it to an AVI. There are a lot of video converters out there, that are free. A good free one is “All to Avi” http://alltoavi.sourceforge.net/download.php but something like Adobe Premier, Sony Vegas or other video editing packages can also be used to convert to AVI video files.
When you are making a video to import, you need to make sure you have the right codecs available for Muvizu:Play to use, we’ve more information on codecs here
It's also worth checking the aspect ration of your video so that it looks right on the object it is displayed on, there is more information on aspect rations here
Optimising your video for import
Video file size is a big concern for Muvizu:Play, since it uses a games engine, and uses a lot of memory and resources on the computer. Video files can be very large as well and in the process of importing them into Muvizu:Play it is possible for Muvizu to run out of memory, or that a video can be imported, but after saving the set file it won’t re-open as Muvizu:Play runs out of memory at that point. A good recommendation is to use the XVid codec, this will reduce a video file's size down to a few megabytes without too much loss of quality. The codec can be downloaded here http://www.xvid.com
Taking these steps can also help maintain the speed at which Muvizu runs. Importing a very large video in Muvizu:Play, will likely slow down and lag out the experience of using Muvizu. The best advice here is to only import the parts of the video actually being shown on camera and to use a compression codec, such as XVid, to reduce the file size.
Best practice
To avoid Muvizu:Play crashing or set files becoming un-openable its a good idea to import any video into Muvizu in a blank, empty scene. Save the scene and re-open it to make sure that the video file is not going to crash or corrupt the set file.
Backups
You’ll probably have spent a lot of time and effort building the set file, the last thing you want is to find that you can no longer open a set file after a video is imported. Copy and pasting your set file and keeping backups is also a very good idea.