Directing Character Eyes And Head
One of the most effective ways to bring life to your characters and keep every moment of your scene in Muvizu:Play as interesting and engaging as possible for the viewer is to use the nice and straightforward "Direct Character Eyes And Head" feature. This allows you, as the name suggests, to maneuver each character's eye and head movement in order to ensure they are looking at or reacting to a particular moment in the scenes like a real person would do.
After creating your character, you can access the "Direct Character Eyes And Head" feature by clicking on the character and then selecting the "Direct" menu header at the top of the Muvizu:Play app. From the "Direct" menu, choose the "Character Eyes And Head" option...
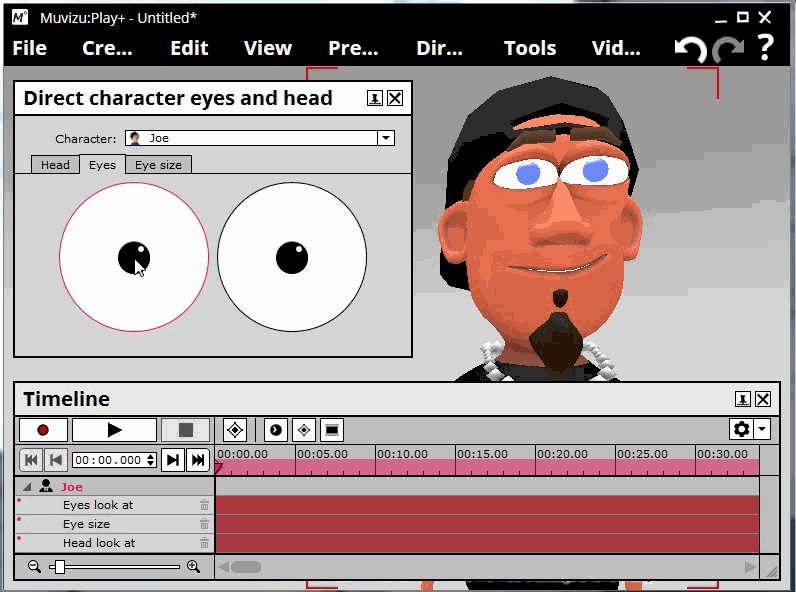
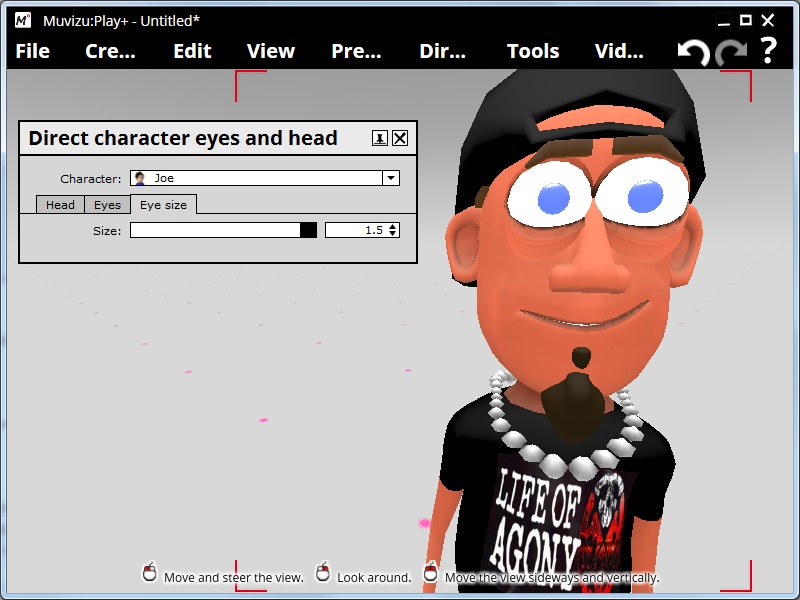
Once you are in "Direct Character Eyes And Head" mode you will see three tabs - "Head", "Eyes" and "Eye Size".
The "Head" tab is controlled by a "trackerball" type mechanic, where you drag the ball inside the circular field of movement and the character's head will move accordingly:

The "Eyes" tab is also controlled by a similar input to the one used for Head movement, where you click on an eye to move it about and the character's eyes will follow that movement.
The "Eye Size" tab is controlled by a slider - the lower the slider is set, the more slanted and "Clint Eastwood"-like the character's eyes will look. This is good for creating an air of suspicion, for example. Increasing the slider will cause the character to gradually open their eyes - a higher setting would be good for expressing a character's surprise.
Give these settings a go and add a little more "life" to your Muvizu:Play videos! Remember that changes to these settings won't take effect until you click "Record" on the Timeline, so have a play around with the settings and try to see how you need to move the trackerballs or slider to in order to get your character to react the way you want before you go for a proper take!